Table of Contents
What are the Steps to Insert a Single Column in excel sheet
- First of all, right-click on any cell in the column.
- Next , you will get a pop-up with various options.
- After this , click on the “Insert” option.
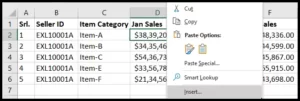
- Now, right-click and you will get a pop-up with multiple options.
- Now, select the “Entire column” option and press ok.

- Here , the column has been inserted to the left of your selected cell.

Tip: you can select the whole single or various columns by selecting the column header letters and right-click, then select “Insert” from the pop-up option. The number of inserted columns always depends on how many columns you have selected.
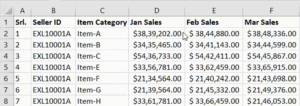
You can also insert the column from the “Home” Tab Ribbon.
- Firstly, make sure that you are on the “Home Tab” and then click on any cell in the column.
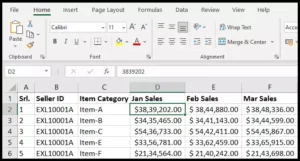
- Here, you will find the “Insert” icon within the “cells” group on the Ribbon

- After this, click on the “Insert” icon and select “Insert Sheet Column” from the listed drop-down option .

- Now , the column has been inserted to the left of your selected column cell.

How to Add Multiple Columns in excel sheet
- To add multiple columns, first of all you need to select different cells instead of a single cell.

- Then, right-click and you will get a pop-up with multiple options.
- Now, click on the “Insert” option.
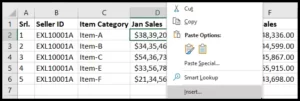
- Once you click on the “Insert” option, you will again get a pop-up option.
- Now, select the “Entire column” option and click ok.
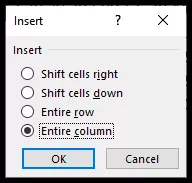
- At this point, three columns have been inserted to the left of your selected cells as you had selected three cells.

- To add the multiple “non-adjacent” columns, First, you need to select the cells one by one by holding the CTRL key from the keyboard.

- Once you select the cells, release the CTRL key
- After that, right-click and click on the “Insert” option from the pop-up options.
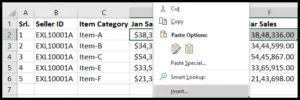
- Now, select the “Entire column” option and click ok.
- At this point, “non-adjacent” columns have been inserted to the left of your selected cells.

How to Insert a Column in Excel Table
When you convert your data set into a table range, the insert column method losses some of its functionality.
For example, you cannot insert non-adjacent columns in one go as you do in a normal data set by selecting the non-adjacent columns to insert columns to the left of them.
In table range, if you want to insert multiple non-adjacent columns, you need to do it one by one.
- First, click on any cell in the column and right-click.
- Now, click on the “Insert” option from the pop-up and then select “Table Columns to the Left”.

- At this point, the column has been inserted to the left of your selected cell.

- To insert the adjacent multiple cells, First, you need to select the multiple adjacent columns.
- Now, click on the “Insert” option from the pop-up and then select “Table Columns to the Left”.

- At this point, two columns have been inserted to the left of your selected cells.

How to Add a Column using a Keyword Shortcut
- After that, press the CTRL + SHIFT+ +(plus) button from your keyboard and you will get a pop-up.

- Now, select the “Entire column” option and click ok.

- At this point, the column has been inserted to the left of your selected column cell.

My favorite shortcut method to insert the column(s) is by selecting the whole column with a shortcut key to the left of which you want to insert the column.
- For this, First, click on any cell within the column and press CTRL + SPACE key from the keyboard and you will find that your whole column is now selected.
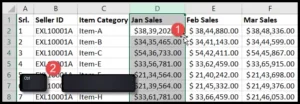
- Now, release the CTRL+ SPACE key and press and hold both the SHIFT + CTRL key, and press + (Plus Sign) from the keyboard.
- At this point, the column has been inserted to the left of your selected cell.

Tip: You can press + (Plus Sign) multiple times to insert multiple columns while holding the SHIFT + Control.


